Flushing Cache Data in Redis: A Step-by-Step Guide
Caching mechanisms are vital for optimizing application performance by storing frequently accessed data in-memory. Redis, as a robust key-value store, offers powerful caching capabilities. Occasionally, you might need to clear or flush all cached data from Redis to ensure consistency or during maintenance tasks. Here’s how you can do it effectively:
Understanding Redis Flushing
Flushing in Redis refers to the action of removing all data stored in the current database. This operation is irreversible and affects all keys in the database, not just cached data. It’s essential to exercise caution when performing this action as it will delete all data.
Method 1: Using Redis CLI
- Connect to Redis: Start by connecting to your Redis server using the Redis CLI:
1 | redis-cli |
- Select Database (Optional): If you are working with multiple databases, select the appropriate one (default is 0):
1 | SELECT <db_number> |
- Flush All Data: Execute the
FLUSHDBcommand to flush the current database:
1 | FLUSHDB |
This command removes all keys from the currently selected Redis database.
- Verify: Optionally, you can confirm that all keys have been removed by checking the number of keys:
1 | INFO keyspace |
The INFO keyspace command will show you the number of keys in each database. If there is no records returned, the database is empty.
For example, execute the INFO keyspace command before executing the FLUSHDB command. Afterward, execute the FLUSHDB command and then the INFO keyspace command. The results are as follows. It shows that db0 is an empty database
1 | 127.0.0.1:6379> INFO keyspace |
Method 2: Using Redis GUI Tools
If you prefer a graphical interface or are uncomfortable with command-line operations, many Redis GUI tools offer a straightforward way to flush data. Tools like RESP(Formerly Redis Desktop Manager), RedisInsight, or web-based interfaces provide intuitive buttons or commands to flush databases.
For example, let’s use RESP.app to flush the data.
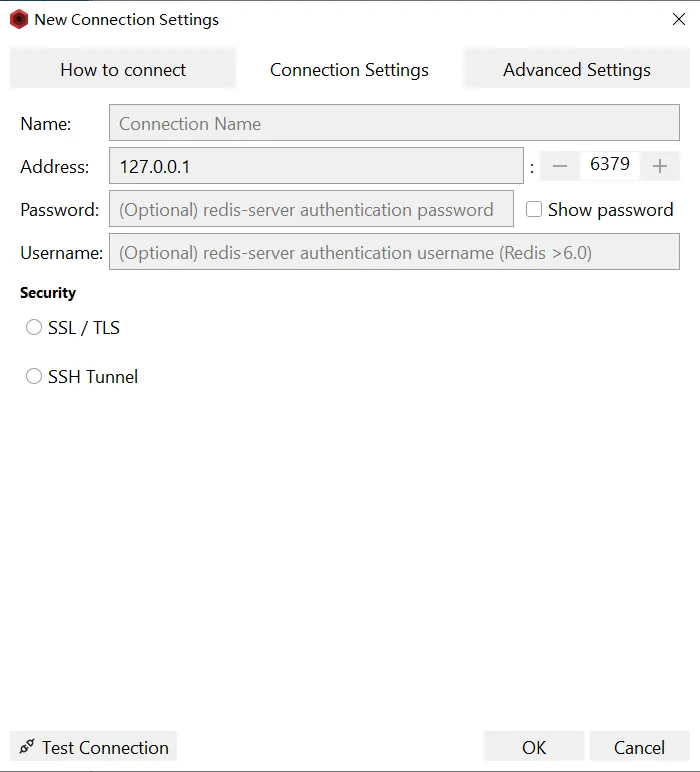
After installing RESP.app, the first step is to establish a connection to your Redis server. Simply click ‘Connect to Redis Server’ on the main window. In the first tab (Connection Settings), provide general information for the connection:
- Name: A name for the new connection (e.g., local_redis).
- Host: The Redis server’s host address (e.g., localhost).
- Port: The Redis server’s port number (e.g., 6379).
- Password: Authentication password for the Redis server (if required). More information available at Redis AUTH command.
- Username: Only required for Redis servers version 6.0 or newer with configured ACL; leave empty for older Redis servers.

After connecting to your Redis Server, click on the connection and expand keys. Next, select the target database (e.g., db0) and sequentially click buttons ‘Bulk Operations’ and ‘Flush Database’. A confirmation window labeled ‘Do you really want to remove all keys from this database?’ will appear; click ‘Yes’ to proceed with data cleanup.
Be careful! Do not use it on Production servers.


Important Considerations
- Data Loss: Flushing Redis data is irreversible. Ensure that you have backups or are certain about the action before proceeding.
- Performance Impact: Depending on the amount of data, flushing can temporarily impact Redis server performance. Plan during low-traffic periods if possible.
Conclusion
Flushing cache data in Redis is a straightforward process but requires careful consideration due to its irreversible nature. Whether using the Redis CLI or GUI tools, understanding how to flush data ensures you can maintain Redis databases efficiently.
Remember, always back up critical data before performing any operations that could result in data loss.

